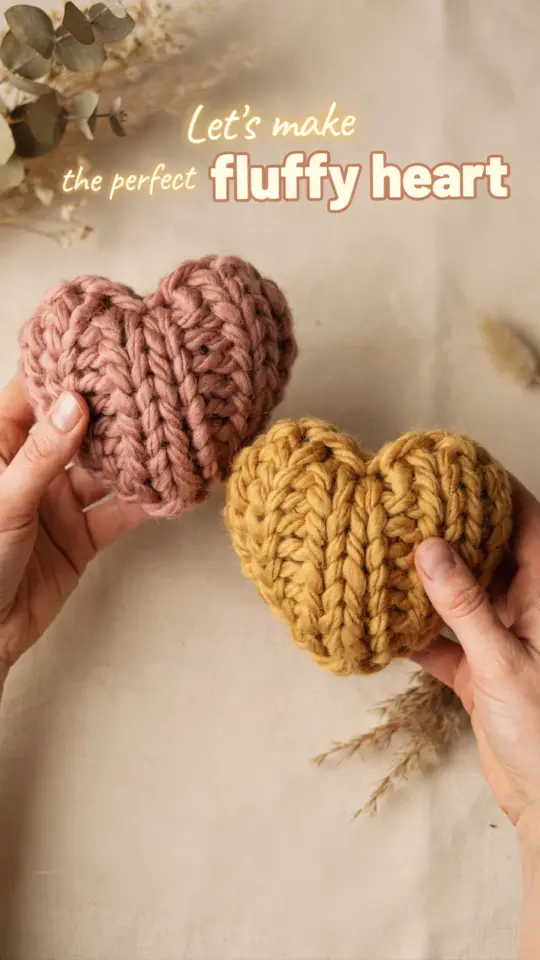
If you have been looking for a simple crochet heart tutorial that actually works the first time, you are in the right place. This beginner friendly pattern creates soft textured hearts perfect for cozy decor, whether you string them into a garland, attach them to a pillow, or fill them with lavender for a sachet. But I have made plenty of mistakes along the way, and that is exactly what this guide is about. Instead of just giving you a pattern, I will walk you through the common crochet heart pitfalls and show you how to avoid them. Save this for later, because once you know these tricks, your hearts will come out even and lovely every single time.
Mistake 1: Using the wrong yarn weight for your project
The first mistake I made when I started crocheting hearts was grabbing whatever leftover yarn I had. Yarn weight changes the size and stiffness of your heart dramatically. A bulky weight yarn will give you a thick, plush heart that works well for a pillow, but it can look lumpy if you try to make a delicate garland.
For most beginner crochet heart decor, a worsted weight (category 4) acrylic or cotton blend is the safest choice. It holds its shape nicely without being too floppy. If you want a more drapey heart for a curtain tie or a keychain, try a sport weight. Test a small swatch before you commit to a whole batch of hearts.
Mistake 2: Ignoring tension and stitch consistency
Uneven tension is probably the top reason beginner hearts end up lopsided. When your stitches are tight in some rows and loose in others, the heart will not curve symmetrically. This happens especially around the increases at the top of the heart.
Here is a simple fix: keep your yarn hand relaxed and try to maintain the same grip throughout the project. If your hands get tired, pause for a few seconds. You can also use a stitch marker at the center of each row to help you spot tension changes early. I recommend practicing a few rows on a small square before you start the heart shape.
Mistake 3: Misunderstanding the increase and decrease points
A classic crochet heart is made by working in rows, then decreasing at the top to create the two lobes. Many beginners either skip decreases or put them in the wrong stitch. The result is a heart that looks more like a lumpy potato than a Valentine decoration.
To get that distinct heart shape, you need to mark the center stitch of your row. For example, in a typical pattern you might increase in the middle stitch of the row and then decrease on either side of the center later. Count your stitches after every row until you feel confident. If your pattern says “sc2tog” (single crochet two together) at specific spots, double check you are working into the correct stitches.
Common fixing tips for shape problems
- If your heart looks too wide, try reducing the number of starting chains by 1 or 2.
- If the lobes are too pointy, you may have decreased too quickly; add an extra row of single crochet between decreases.
- When the heart curls inward at the bottom, your starting chain might be too tight. Use a slightly larger hook for the first row only.
- For a flatter heart, block it after finishing. Spray with water and pin it to shape on a towel overnight.
Mistake 4: Forgetting about the back loop or front loop texture
One of the reasons crochet hearts look extra cozy is the textured fabric. However, many patterns tell you to work in the back loop only for part of the heart. If you accidentally work through both loops, the texture disappears and the heart may not fold correctly when you stuff it.
Read your pattern carefully. If it says “working in back loops only” (BLO), it is usually to create a ridge that helps the two halves of the heart align. Mark the front of your work so you do not get turned around. I keep a small sticky note on my desk that says “BLO here” to remind me at the right row.
Mistake 5: Rushing the assembly or seaming
If you are making a heart shaped sachet or a two piece heart to attach to a garland, the seaming step can ruin all your careful work. Using the same color yarn and a tapestry needle, whip stitch the edges together but do not pull too tight. If you pull hard, the edges pucker and the heart loses its soft look.
Another error is forgetting to leave an opening for stuffing or turning. Always finish your seam with a few extra stitches to secure it. For garland hearts, you can simply sew them together with a small loop of yarn at the top. Do not use a bulky knot, weave in the ends neatly instead.
M
#crochettutorial #crochetheart #cozydecor #crochetlover #easycrochet
Leave a Comment