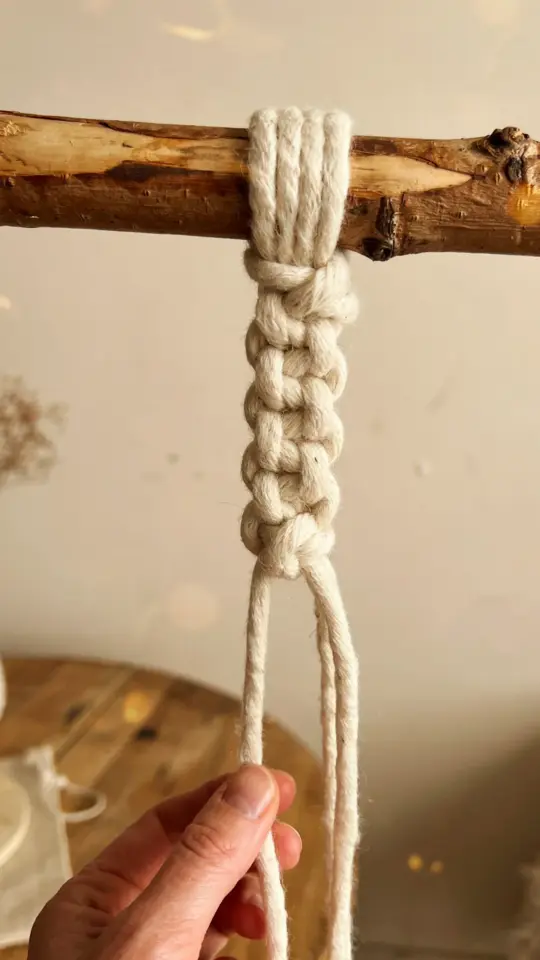
If you are new to fiber art, the phrase macrame knot techniques for beginners can feel both exciting and a little overwhelming. I remember staring at a tangled pile of cotton cord, wondering how anyone turned it into beautiful wall decor. The secret is that you only need three basic knots to make almost any project, from a simple hanging to a plant holder. Once you learn the lark’s head, the square knot, and the half hitch, you can create dozens of designs. This article is a curated roundup of project ideas that help you practice these knots in real, useful ways. Each section focuses on a different theme, so you can choose what fits your style and skill level.
Easy Macrame Wall Hanging for Beginners
A wall hanging is the perfect first project because it lays flat and you can see your knots clearly. Start with a wooden dowel or a branch, and use the lark’s head knot to attach your cords. I suggest using 12 to 16 strands of 4mm cotton cord, each about 3 feet long. That gives you enough working length to practice a row of square knots.
After you attach the cords, tie a few square knots in the center. Then use half hitches on the sides to create a slight diagonal pattern. The result is a simple, textured piece that adds warmth to any room. You can leave the bottoms straight or cut them into a V shape for a different look. The best part is that this project only uses two knots, so you build confidence fast.
DIY Macrame Plant Holder Tutorial
A hanging plant holder is a classic macrame project, and it teaches you how to work with a round shape. For this, you need four long cords, each about 8 to 10 feet. Fold them in half and use a lark’s head knot to attach them to a ring. Then tie a series of square knots in a staggered pattern.
The key is to keep tension even as you work around the pot. I like to place a small plastic or terracotta pot inside the knotting space as I go, so I can adjust the fit. This project also introduces you to the half hitch spiral, which looks like a twisting vine. It is a beautiful way to add detail without learning a new knot. Just repeat half hitches in one direction, and the cord naturally spirals.
Simple Macrame Keychain Pattern
If you want a quick win, make a keychain. You only need two cords of different colors, a key ring, and about 20 minutes. Start by folding one cord in half and attaching it to the ring with a lark’s head knot. Then tie square knots with the second cord wrapped around the first.
This small project is excellent for practicing knot tightness. If your square knots are too loose, the keychain looks messy. Too tight, and it twists. You will find a comfortable rhythm after a few tries. I also like to add a small wooden bead at the end for a finished look. It is a great gift idea that uses very little material.
Boho Macrame Dream Catcher Craft
Dream catchers combine macrame with a circular frame, like an embroidery hoop or a metal ring. The knots you already know work beautifully here. Wrap the ring with cord using a series of half hitches. Then create a web inside by tying double half hitches between the spokes.
For the hanging part at the bottom, use a row of square knots to attach feathers or beads. This project lets you play with color and natural elements. I prefer using undyed cotton cord for the base and adding dyed cords for accents. The half hitch knot is the star here because it allows you to change direction and fill space precisely. It takes a bit more patience, but the result is stunning.
Macrame Coasters for Home Decor
Coasters are a practical way to use up leftover cord. They are also a great test of your square knot consistency. Cut 8 to 10 cords of equal length, about 2 feet each. Attach them to a small ring or simply fold them in half and tie a gathering knot.
Then tie alternating square knots in a grid pattern. Work row by row, making sure each knot sits next to the previous one. The finished coaster should be about 4 by 4 inches. You can also add a simple border of half hitches to neaten the edges. These make
#macrameknots #DIYmacrame #yarncraft #bohodecor #macrametutorial
Leave a Comment