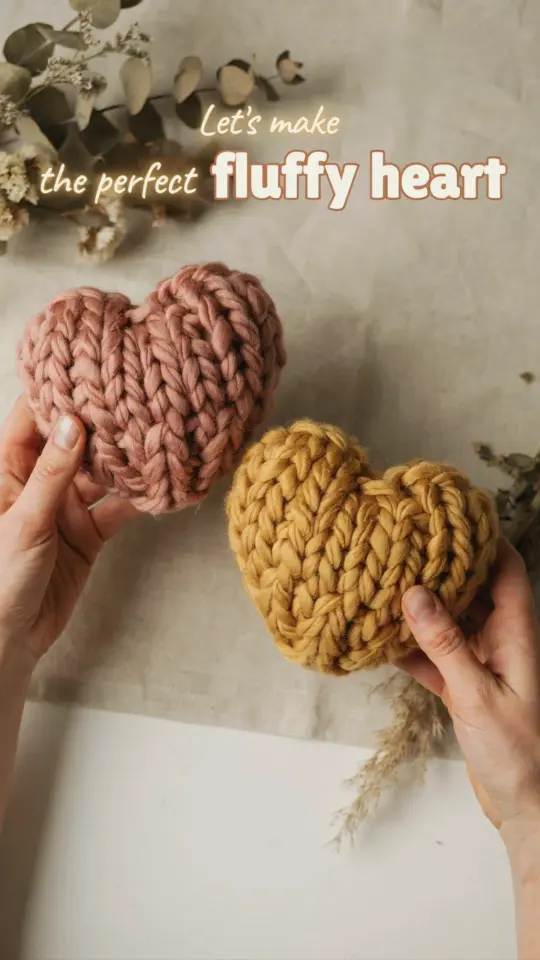
So you found the same Pinterest pin I did, the one with the impossibly perfect crochet heart, and you thought, “Yeah, right, that’s for someone else.” I get it. The finished result looks like it requires a degree in advanced yarn sorcery, but a crochet tutorial heart project like this is honestly just a matter of surviving the first three minutes. I sat down with a tangled disaster of a skein, one hook, and a whole lot of doubt, and popped out a little heart that now lives on my bookshelf. It took less time than a single episode of a sitcom.
This isn’t a run-of-the-mill pattern recap. Think of this as the guide to the pitfalls, the broken yarn, and the frogging (that’s ripping out stitches, for the uninitiated) that almost made me quit. If you’re chasing that cozy knit decor vibe for your space, you need the real talk on what goes wrong and how to fix it. Let’s turn your messy ball of potential into something you actually want to look at.
Mistake #1: Using the Wrong Yarn and Hook Sizes
Look, I started this crochet heart tutorial with a chunky, fluffy chenille yarn because it felt so soft in the store. Big mistake. Huge. I couldn’t see the stitches, the loops were fighting back, and my heart looked like a sad, lumpy potato. The specific fiber you choose makes or breaks the project.
For your first few tries, you want a smooth, worsted-weight yarn in a light color. It’s not about being boring, it’s about being able to actually see where your hook is supposed to go. That visual clarity matters.
Here’s the thing about hook size: if you use the giant hook that matches the yarn weight, you get holes. This little decorative heart needs a tight fabric so the stuffing doesn’t peek through. I went down a full hook size from the yarn label recommendation. Honestly, the yarn brand and exact hook size matter less than the tension you use; just pull your stitches snug.
The Magic Ring Mess vs. The Chain Start
The pattern probably says “make a magic ring,” and that probably made you close the tab. I don’t blame you. The magic ring is slippery and annoying, but it is the difference between a heart with a tiny, neat center and one with a weird hole in the middle. It’s so worth wrestling with.
If the magic ring truly makes you want to throw the yarn across the room, there is a solid alternative. You can chain 3 and slip stitch to form a loop, then work your first round into that loop. It creates a slightly thicker center, but you’ll still get a workable shape.
But here’s my honest advice: just try the magic ring. I know, I know, you’ve heard it before. But the first time you pull that tail and the center closes up completely, it feels like a magic trick. That feeling is the exact moment a crochet heart pattern goes from terrifying to satisfying. It makes the whole thing feel like “real” crochet.
Not Counting Stitches in a Crochet Heart Pattern
This is the section where I admit my own hubris. I thought I could “eyeball” it. I thought, “I’ll just put an extra stitch here, no one will notice.” I was wrong, and the universe punished me with a shape that looked more like a deflated balloon than a heart. You have to count. There are no shortcuts.
The top curves of the heart depend completely on symmetrical increases. If you add an extra single crochet on the left lobe but not the right, you get an asymmetrical, lopsided tragedy. It doesn’t stay soft and organic, it just looks broken.
I know you want to skip this, but placing a stitch marker at the start of the round takes five seconds and saves five minutes of confusion. I use a bobby pin since I always lose my actual markers (dramatic sigh). Do yourself a favor and just write the numbers down if you have to, or count out loud like a crazy person.
Getting the “V” Shape Right in the Top Rounds
For the first few rounds, your work looks like a circle. This is normal. Do not panic when it looks nothing like a heart yet. I was about three rounds in, staring at a cup shape, wondering where I went wrong. Trust the process, because the “V” shape of the heart doesn’t emerge until you hit those top increases.
The trick to a defined heart top is working two specific stitches into the same stitch at the peak. The pattern will call for a double crochet or a treble crochet here, and they are taller than the single crochets you used earlier. That height is what creates the little “bump” on the top of the lobes.
This is the part where the “before and after” moment happens. Those taller stitches alongside a chain space create the plunge in the middle? No, actually, it’s the combination of the increases and the tight chain that pulls it into shape. Suddenly, it clicks and you see the silhouette, your shoulders drop, and you realize you actually know what you’re doing.
Combating Stiff Hands and Rushing the Rounds
Look, you’re probably reading this because you want a quick win, a 15-minute project to break up the monotony. But if you grip the hook like it’s a lifeline and you’re drowning, your hands will cramp up by round four. Your tension gets tighter and tighter until you literally cannot get your hook through the loop.
Gently does it. Seriously. If you find yourself yanking the yarn, stop and breathe.
– Rest your hands for a minute and wiggle your fingers.
– Check your grip on the hook, try a pencil hold instead of a knife hold.
– Loosen the yarn around your tension finger, it doesn’t need to be that tight.
– If you’re forcing the hook through, your tension is too high, rip the stitch out and go looser.
Slowing down actually makes the whole process faster. You’ll avoid the stress and the inevitable frogging that comes from working with a stiff, taut yarn that fights back. You want a fluid rhythm, not a frantic tug-of-war.
Stuffing and Seaming the Cozy Knit Decor
Alright, so you have two identical heart halves. They look great, but they aren’t attached yet. This is where so many people mess up by sewing them together with a mismatched yarn color or using a needle that’s too thick. Use the tails from your starting chain to sew the pieces together; they blend in seamlessly.
I like to use a whip stitch, but don’t pull it too tight or the edges will curl up like a taco. You want to match stitch for stitch, going through the back loops only for the cleanest finish. Weave those ends in securely, because nobody wants a tumbleweed of yarn fluff on their shelf.
Before you close that final seam, shove the stuffing in. Don’t overstuff, you want it soft and squishy, not as hard as a baseball. A little bit of poly-fil goes a long way for this type of cozy knit decor. It’s the final stitch that makes it feel like a ‘real’ object, rather than just a flat experiment.
Hanging and Displaying Your Finished Heart
Once it’s done, don’t just toss it in a drawer. You made this thing, you gotta show it off. I added a simple braided yarn loop to the top of mine so I could hang it off a small wooden dowel on my wall. It’s subtle, but it catches the light and looks so intentionally placed.
They also make great ornaments, bag charms, or zipper pulls. I might make a few in different colors for next Christmas, or just to scatter around the house for a pop of color. The versatility here is off the charts for such a small time investment.
Anyway, the next time you pick up your hook, just remember that everyone’s first heart looks a little rough. That’s okay.
Give this a shot this weekend, or tonight if you have twenty minutes to spare. And when you finish, hang it where you can see it and smile at your handiwork. That handmade touch is exactly what your space needs, so grab a skein and try it.
Leave a Comment