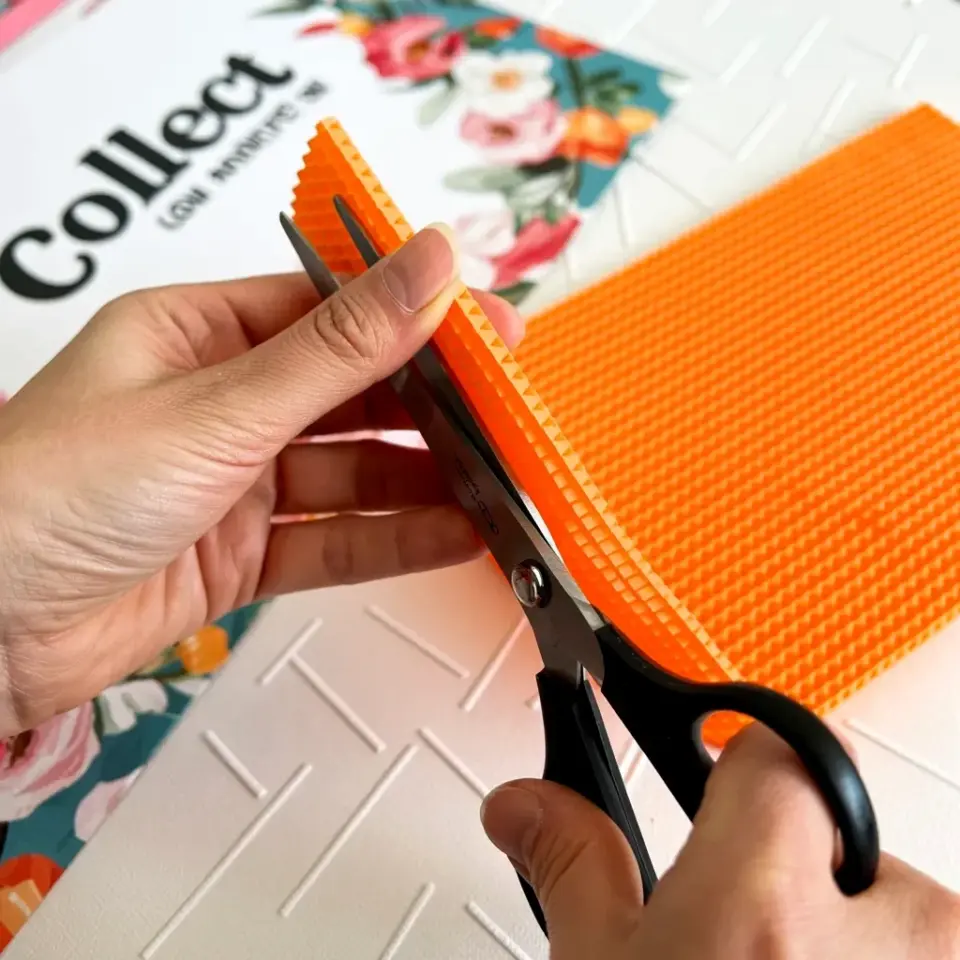
There is something incredibly satisfying about the moment those black scissors bite into a bright orange sheet of textured craft foam. I was sitting at my kitchen table, the afternoon sun catching the raised ridges of the material, and I honestly paused just to watch the cut happen. The waffle pattern on that foam gives it a whole different feel compared to the smooth sheets I usually hoard. It is thicker, a little more resistant, but the blades just sliced right through it like butter. I was making autumn wreath accents, but I stopped mid-project because the visual of the bright orange material against my white cutting mat was too good not to share.
That photo, the one with my hands mid-cut and my old “Collect” paper pad sitting in the background, kind of sums up my entire fall crafting philosophy. It is messy, it is hands-on, and it is full of texture. If you are tired of flat, boring cutouts and want your fall DIY to actually look handmade in a cute way, this orange waffle foam craft idea is the perfect place to start. I mean, who knew that a material resembling a breakfast food could be so pretty?
Why Waffle Texture Foam is My New Favorite Autumn Supply
Look, I have a whole bin dedicated to smooth foam sheets, and they definitely have their place. But the waffle texture changes the game for me. The raised grid pattern catches the light in a way that flat foam never does, giving your finished projects a woven or quilted look that feels super rich. It is the easiest way to add dimension to a project without having to actually layer fifteen different pieces.
The texture looks especially good in autumn colors. The shadows that fall into the little recessed squares make the orange look deeper, almost like a pumpkin that has a bit of a pattern to it. Plus, the texture helps hide glue marks and pen lines if you mess up. Honestly, if you make a mistake on smooth foam, everyone sees it. On this stuff, you can just press it into place and the ridges distract the eye. It is a very forgiving material.
What You Need to Cut Orange Foam for Fall DIY Projects
Okay, so before you dive into your craft stash, let’s talk gear. You do not need a fancy electronic cutter for this. Honestly, I think hand cutting gives the finished pieces more personality, anyway.
Here is what actually worked for me:
- A sharp pair of scissors with a comfortable grip. I used a pair with black handles that have a little spring in them, which saves your hand when cutting curves.
- a self-healing cutting mat. This is essential if you are using a craft knife for the centers of leaves or small circles.
- A metal ruler. Plastic rulers can get chewed up if you slip with a blade. Ask me how I know.
- Fine sandpaper or a nail file. This is a weird tip, but it smooths out the rough edges on the back of the foam if you cut too aggressively.
I will say, the quality of your scissors matters more than you think. I tried using an old pair from the kitchen drawer once, and it just crushed the foam instead of slicing it. That waffle pattern is sturdy, but it is still foam. You need a clean slice to keep those pretty ridges intact. When the foam squishes instead of cuts, the whole texture gets ruined and it looks like a bite was taken out of it.
How to Cut Waffle Foam With Scissors (Without Ruining the Texture)
The biggest mistake I made when I first tried cutting this stuff was going too fast. The waffle texture has a bit of give to it, so if you rush, the foam tends to bend and fold under the blade instead of cutting cleanly. You want to use long, slow strokes with the base of the scissors, right near the screw. It gives you more leverage and keeps the cut straight.
Another thing I learned the hard way: do not twist the scissors to turn corners. Lift the foam, turn it, and start a fresh cut. If you twist while the blade is still inside the material, you will stretch the waffle squares and they will not match the grid pattern on the rest of the piece. It is not the end of the world, but it is noticeable when you are making a wreath and the light hits it weirdly.
For intricate shapes like small acorns or detailed leaves, I actually recommend a sharp craft knife over scissors. For larger accent pieces, scissors are faster and give you a more organic line. Also, working on a textured white surface really helps you see the contrast between the dark scissors and the bright foam. It is so much easier to be precise when you are not squinting to see your cutting line.
Making Wreath Accents: A Step-by-Step Fall DIY
So, what was I actually making in that photo? Wreath accents. I am not a huge fan of the massive, expensive pre-made wreaths you find at the big box stores. They all look the same. But making my own accents lets me build a wreath that actually matches my decor, which this year is a lot of deep orange and cream.
Here is the process I used for the fall DIY accents. First, I drew simple leaf shapes onto the back of the orange foam sheet with a ballpoint pen. The indent helps guide your scissors without leaving a permanent ink mark on the front. Then, I cut them out using those slow, steady strokes I mentioned. I made about six large leaves and four small teardrop shapes. Next, I used a hole punch to add a small hole at the base of each piece.
This is where the waffle texture really shines. The pattern gives the leaves a “hand-quilted” look that pairs beautifully with natural materials like grapevine wreaths or twigs. I also cut a few strips of the foam to weave through the wreath base. The strips bend easily without breaking, which is perfect for securing them tightly to the frame. It is a simple way to make a fall wreath look like it cost a fortune, even though it was mostly just an afternoon of cutting up foam.
Using the Orange Waffle Foam Scraps for Autumn Crafts
Do not even think about throwing away the scraps. I know, I know, the bits are tiny, but they are too good to waste. The pieces that were too small for leaves became the perfect little circles for faux berries. I just punched them out with a standard paper punch. The texture makes them look almost like mini pumpkins or stylized acorn caps.
I also chopped up a few thin strips to use as filler inside a clear glass vase. I have a tall cylinder vase in my living room that usually holds pine branches in winter. I filled it with these orange strips and a few battery-operated candles for a quick fall centerpiece. It looks surprisingly high-end, and if the foam gets dusty, I can just toss it out and cut more in five minutes. It is a low-commitment decor change, which is my favorite kind.
My one real tip for scraps is to store them in a labeled zipper bag. You will be shocked by how often you need a tiny piece of orange texture foam for a school project or a last-minute ornament. Having them pre-cut and sorted saves me so much time during the busy holiday season.
My Top Tips for Fall Foam Craft Success
Alright, let’s wrap up the practical advice. Here is the thing, sometimes foam crafts can look a little cheap, especially if you are using bright colors. But the waffle texture and the right shades of orange and gold make all the difference. I stick to burnt orange, deep rust, and mustard yellow. They feel much more autumnal than a standard fire-engine orange.
Also, let the texture do the work. You do not need to paint or embellish these pieces heavily. The grid pattern is already the decoration. If you add too much glitter or paint, you will clog up the little waffle squares and lose the effect. I tried painting one with a matte acrylic, and honestly, it totally killed the vibe. The paint filled the recesses and made it look like a flat, sad piece of plastic.
I will admit, I am already planning my next project with this material. I am thinking about making a garland for the mantle. I am just gonna string a bunch of these textured leaves onto some twine with a needle. The foam holds the needle hole really well, so the pieces slide back and forth along the string to adjust spacing. It is going to look so good with the fairy lights. I cannot wait to get back to the table and do it all again, maybe with a cup of hot cider this time.
There is just something about the bright orange color and that distinct waffle texture that makes autumn crafts feel fresh, even if the DIY is pretty simple. I hope you give it a try with your own wreath or garland. Save this idea for your next craft day and grab some of that orange waffle foam. You will not regret it. Happy crafting!
Leave a Comment