Why This Kawaii Mushroom Pattern is Perfect for Fall
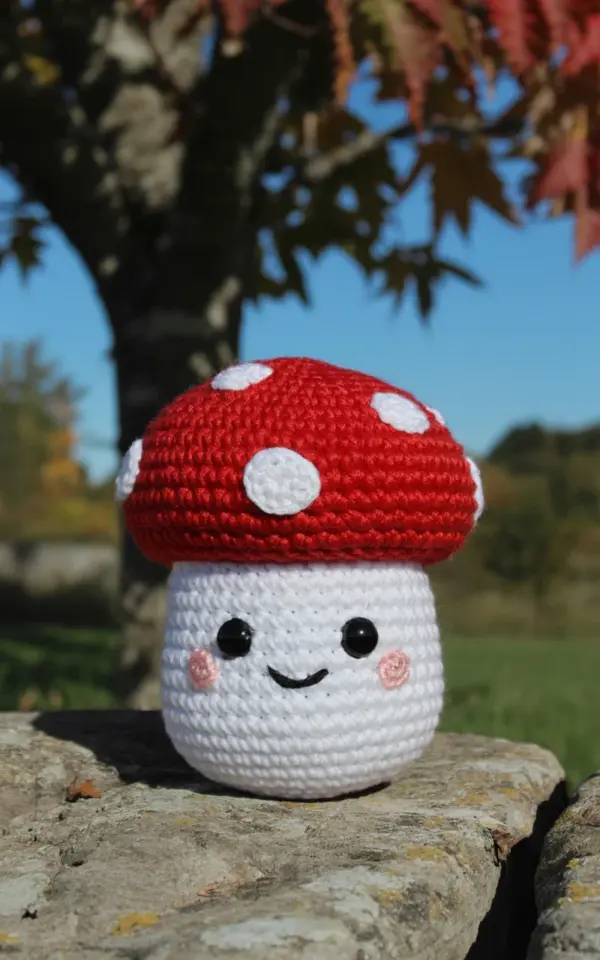
If you have been looking for a free amigurumi mushroom pattern that feels both cozy and cute, this little red toadstool is exactly what you need. I took the photo for this pattern on a gray stone in my backyard, with crunchy autumn leaves scattered behind it. The bright red cap and white dots pop against the earthy tones, making it a natural fit for fall decor. Whether you want a tiny companion for your desk or a handmade gift for a friend who loves mushrooms, this project delivers that kawaii charm without a lot of fuss. The pattern uses simple stitches you already know, so it is a great way to ease into the season.
Materials You Will Need for This Easy Crochet Project
Gathering your supplies for this kawaiicrochet project is straightforward. You probably have most of these in your stash already. Here is what I used for the mushroom in the photo:
- Worsted weight yarn in bright red (for the cap), white (for the stem and spots), and a small amount of black (for the face, though black beads work even better)
- A crochet hook in size 3.5 mm (E) or whatever gives you a tight fabric so the stuffing does not peek through
- Polyester stuffing or fiberfill
- Two 6 mm black safety eyes (or black beads if you prefer sewing them on)
- Pink embroidery floss or fabric paint for the rosy cheeks
- Stitch markers, a yarn needle, and scissors
I also recommend keeping a small pair of tweezers nearby to push fluff into the stem. It makes the shaping much easier, especially for beginners.
How to Crochet the Cap and Stem (Simple Stitches Only)
The pattern itself is an easycrochet project because it relies on single crochet, increases, and decreases. You start with the stem in white, working in continuous rounds from the bottom up. It is basically a tube that widens slightly at the top, which creates that classic toadstool shape. The cap is worked in red from the center outward, like a flat circle, then you fold it slightly and add the white spots. For the spots, you can sew small white yarn circles on top or use surface slip stitches. I did a combination of sewn circles and small French knots to get that polka-dot look you see in the photo. The whole mushroom takes about an hour and a half from start to finish, depending on your speed.
Adding the Kawaii Face: Bead Eyes and Rosy Cheeks
This is where the mushroom really comes to life. In my version, I used black safety eyes placed about four stitches apart, right at the center of the stem. Then I embroidered a small curved smile with black embroidery floss, making sure the ends are tucked neatly inside. For the rosy cheeks, I applied a tiny dot of pink fabric paint with a toothpick, but you could also use a bit of pink eyeshadow or blush powder on a cotton swab. The key is to keep the face low on the stem so the cap overhangs like a little hat. That gives the mushroom that sweet, slightly shy expression. If you are making it for a child, sew on bead eyes instead of using plastic safety eyes, just to be extra safe.
Styling Your Crochet Mushroom for Autumn Displays
Once your mushroom is finished, think about where you will place it. In the photo I took, the mushroom sits alone on a weathered gray stone, with golden and copper leaves in the background. That kind of natural setting really highlights the red cap. You can group several mushrooms together on a windowsill, scatter them among pinecones and dried orange slices on a
#freecrochetpattern #amigurumimushroom #kawaiicrochet #crochetplush #easycrochet
Leave a Comment