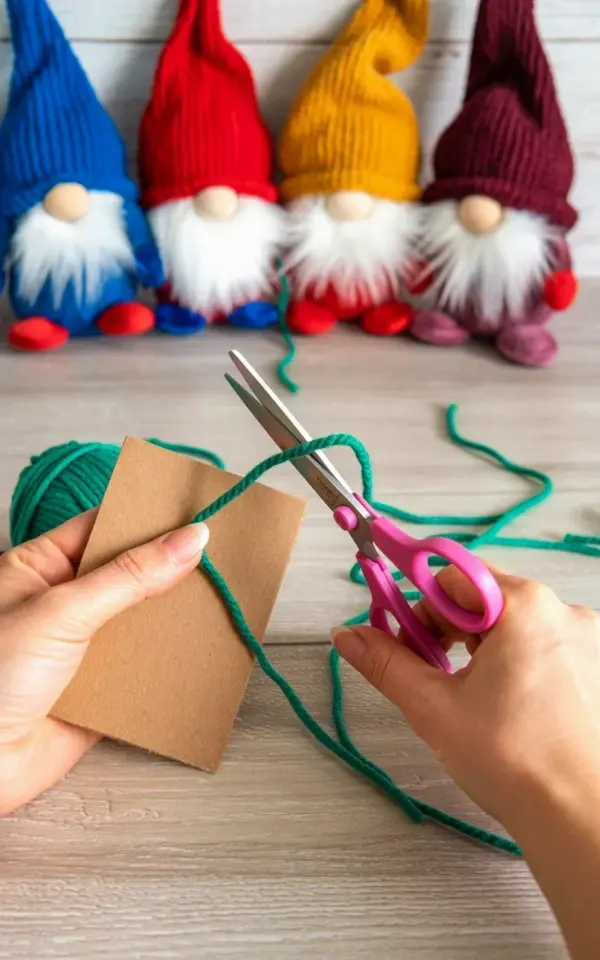
Look, I’m not gonna lie, I was elbow-deep in green yarn scraps when I took that photo. My pink scissors are technically for fabric, but they work so well for this yarn gnome Christmas craft tutorial. You can see my test subjects in the background: four little guys with white fluffy beards and hats in blue, red, yellow, and burgundy. Honestly, making these DIY festive gnomes is the most satisfying way to kick off the holiday season.
Why These Little Guys Beat Store-Bought Decor
Here’s the thing about holiday decorations. You can spend forty bucks on a trendy gnome at the big box store, or you can make four of them for the price of a single skein of yarn. And they won’t look exactly like everyone else’s. That matters to me.
The weird specific joy of trimming their beards just right is oddly therapeutic. I sat on my couch, arranged them on that light wooden surface in the photo, and just stared at them for a minute. They looked so proud. Plus, they make perfect handmade gifts for neighbors or coworkers. Pair a burgundy hat gnome with a bottle of wine. Done. You look like a thoughtful gift-giving genius for maybe three dollars in materials.
Gathering Your Supplies – What You Actually Need
Ok so here is exactly what I used. Don’t overthink the supply list, seriously. You probably have most of this lying around. If you don’t, a quick trip to the craft store will set you back maybe ten bucks total.
- Yarn in various colors. I used worsted weight acrylic because it’s cheap and soft. Green for the body, white for the beard, and blue, red, yellow, and burgundy for the hats. You can use scraps from old projects.
- A cardboard tube or piece of cardboard. In the photo, you can see I’m holding a piece of brown cardboard. I cut it from a shipping box. It needs to be about 3 to 4 inches wide. Nothing fancy.
- Pink scissors. Are they necessary? No. Do they make the process more fun? Absolutely. But any sharp scissors will do. Just make sure they’re sharp or you’ll be fighting with the yarn.
- Hot glue gun and glue sticks. The unsung hero of every craft project ever. I bought a cheap low-temp gun specifically so I stop burning my fingerprints off. I still manage to burn myself.
- Small red pompoms. For the noses. The standard 1cm size works best. I tried using 2cm pompoms and they looked like clown noses. Not the vibe we want here.
- Optional but helpful: A thimble or a piece of tape for your finger. You will burn yourself on the hot glue. I always do. It’s a rite of passage. Also, a ruler is helpful if you want your gnomes to be uniform in size. I don’t. I like a chaotic gnome family.
Building the Beard and Body – The Fluffy Foundation
Start by cutting your piece of cardboard to about 3 inches wide. Wrap your white yarn around it maybe 30 to 40 times. The more wraps, the thicker the beard. If you want a scraggly beard, do fewer wraps. I like a full fluffy beard, so I go heavy on the wraps.
Slide the yarn off carefully. I saw someone do this in a video and it looked so easy. It took me three tries. Keep at it. Tie a separate piece of white yarn tightly around the center of the bundle. Cut the loops on both ends. Fluff it out. It’s going to look a bit like a messy yarn lollipop.
Now pat it down and trim it into a nice rounded beard shape. This is where the magic happens. My cat tried to steal the yarn lollipop while I was trimming it. I had to chase her around the apartment holding a half-finished gnome. Anyway, once you have the beard fluffed and shaped, set it aside. Repeat this whole process for the other gnomes if you’re making a set.
Wrapping the Colorful Hat – No Knitting Skills Required
Take your hat color. For me, it was blue for the first one. Wrap it around the same cardboard piece maybe 60 to 80 times. You want this bundle to be thicker than the beard bundle. The hat needs structure. If you wrap it too thin, it looks flimsy and sad.
Tie it off the same way you did the beard, but leave the loops intact on one end. That curly fringe becomes the tassel of the hat. It’s a total cheat code for making hats without actually knowing how to knit.
Here’s a trick I figured out by accident: if you trim the tassel really short, it looks like a pompom. If you leave it long, it looks like a whimsical witch hat. I left the yellow one long and trimmed the blue one short. Both look great. Go with your gut. Glue the hat bundle onto the top of the beard bundle. Make sure the hat covers the raw middle seam of the beard. You don’t want a bald spot on your gnome.
Assembling Your Gnome – The Nose Knows
Apply a generous dot of hot glue onto the middle of the beard, right below the hat seam. Press a red pompom into the glue. Hold it for
#yarncraft #gnomecraft #christmascrafts #diyholiday #yarnart
Leave a Comment